Friday, 13 December 2013

OOOH TORTOISE.

HELLO FRIENDS.

I'm on my FINAL 3rd year project now! Well I say that… Been doing it for a couple weeks now. But I've been soooo busy with my new harmonica/acapella band that I haven't even blogged about it. You know how it is.

Normality never seems to strike me. Ever. So in HOMAGE to this fact, this year I'm going to do a story about a Tortoise and a Blob trying to get a job.
I like the word homage.
Thats my new word of the day.

So even despite almost failing to keep my harmonica/accapella band going, (we've had a couple of drop outs sadly :( ) I have actually got round to doing some development work for my next project.

Above is a lil tiny visual of what it may look like!

DO YOU LIKE IT?
or here's an alternate design…


Ooh look at him!

Well thats all for today! Short post! Just thought I'd let the internet know! Its like 2:45am so I should shut up really.
I'm working through an animatic/storyboard at the mo, so to sum up, I think I've had progress, with a hint of disappointment with this harmonica/acapella band, but overall, I hopefully know what I'm doing :)

By the way, I don't really have a harmonica/acapella band, I just want to know if anyone reads this rubbish.

Friday, 15 November 2013

WEAR A HELMET - STOP MOTION/AFTER EFFECTS PERFORMANCE


Well, Hi there neighbour! 
Last time I was nattering on about some animation I was doing about a bike and a forest or something..?
Well here it be!
Give it a watch, and a like and tell all your friends IF YOU WANT TO!

This was a project for university where we had to incorporate After Effects into a 10-15 second stop motion performance.

So in true Sean fashion, I DID 35 SECONDS! WAHOO

To make this lil animation, I first animated it in the studio, Here's a little image of my set up: 


The first thing to do was erase all the rigs that can be seen holding my character up throughout the animation. 
This is a frame from the original animation, rigs n' all.


So here's how I went about it… IN PICTURES!


 Once all the colour correction and masks were done, it was on to keying out the green/blue screen and then sticking the animation in a forest.
So in order to have a forest, one must make a forest.
HERES WHAT I DIGITALLY PAINTED IN PHOTOSHOP, 
This consists of 9 layers going in order of:
 Blurry Bush
Blurry Tree
Ground and Red Bush
TREES
Dark red bush
Mist
Blurry Green Bush
TREES
TREES
Sky
The layers were then imported into After Effects and made into a very long digitally made 3D set.
Once that was done, I went on to animating movement in the original bike footage, so it wasn't just in one static place.
I then went on to adding the effects for the animation such as the flames, smoke, dust and dirt. 
Starting with the the jet's flame, using the 'CC Particle World' simulation preset that after effects provides.
HERE'S WHAT I DONE.
I found that the jet looked cooler with a blue flame squirting out the back, so I fiddled with the options and came out with this lil guy below, HE LOOKS LIKE A CUTE LITTLE WISP.
The lil wisp was then animated following the bike... 
Then I animated the camera. After that, the dust dirt and explosions, kindly donated by Mr. James Carlisle and his friend in the VFX Course of USW. (Who's name I do not know, but THANKS A BUNCH!)

Then I had the final animation ready and done! It took 6 hrs to export! WAHOO! 
Glad I got a RAM update over the summer!

In other news, a film I made back in school has been nominated for an award on Monday at Cardiff Millennium Centre. Which is strange, as I made it in 2010 and it's pretty basic! hah
Oh well! Can't complain! 

Tuesday, 5 November 2013

STARTING A (FUNKY) FRESH

I'm in my third year in uni now… 

WHAT…

I think I've gone a bit mad. 
OH WELL

TO START OFF THIS LOVELY SHINY NEW UNI YEAR, We were assigned a lovely shiny new uni brief. 
The idea is to come up with an equally lovely shiny new idea for  a 10 - 15 second performance, that incorporates AFTER EFFECTS and LIP SYNC 

Lovely, Shiny New.

SO, I wanted to do a bike piece, due to this lovely, (and sort of) animatable bike I got for my birthday off my Grandparents. ITS FROM JOHN LEWIS
LOOK HOW BIG THE HANDLEBARS AND SEAT ARE!

I slightly modified this lovely bike so that it was more animatable and would stand up on its own, sturdily!
Here's a little picture of how I modified the Bike. 


I sculpted a new seat from Super Sculpey Firm, fitted it with a magnet to stick the character down, I then sculpted some new handle bars, and created holey miliput pedals so that I could use tie downs, enabling me to simply stick the feet to the pedals!

I also sculpted some glovey hands thingys, clayed them up and made them in silicone.

OH YEAH!
 I ALSO used a LOVELY SHINY NEW BALL AND SOCKET ARMATURE from


Here's a frame from my animation :) First time using a ball and socket, and THEY SAVE SO MUCH TIME AND FUSS. EVERYONE JUST GO BUY ONE! 


So… The idea for my animation is that my character has a jet on the back of his bike… and he presses a button, and it kind of goes out of control… 
I did originally think, yeah, I'll do a really nice, Paranorman-esque bike piece, riding through the country side… Get some really nice weight and subtleties 
But nah. 
Jets are cooler.

Anyway. Now I'm in the process of after effectsing rigs out, green screening, animating flames, effects and lighting and adding a multi plane forest to my animation, so I've got a lot still to do!

I'll keep you POSTED. 
SOON.

Tuesday, 3 September 2013

I AM NOT A BLOGGY BUNNY AT THE MINUTE

I've recently found out that I AM NOT A BLOGGY PERSON at the minute.
And therefore, way too much has happened (In way too many ways) since my last post...
So updating will just kill me and my laptop.
So here's Simon Pegg and Bill Bailey to distract you.

I might update stuff soon, but ya know, there's plenty more gifs where that came from.

Monday, 27 May 2013

This project is costing me an arm and a leg!


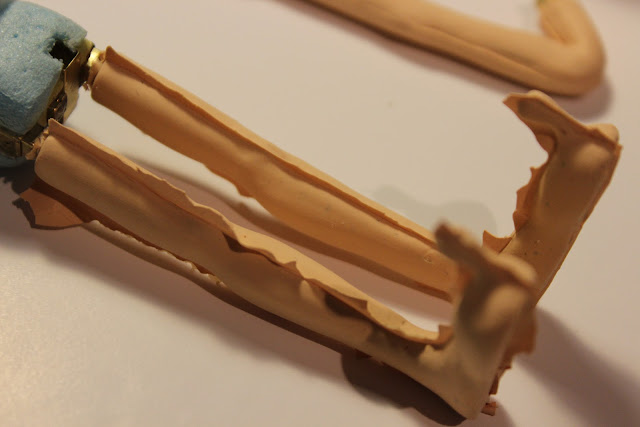
Now, Moving on to the arms and legs...                                             Firstly, I sculpted in Super Sculpey Firm on top of my armature to make some nice little arms and legs (I've lost the pics of the arms, SORRRY)   I then 'Clayed up' the sculpts with the same process seen in my previous post about the minature silicone girl I made.                                             Here are some pictures!


 After making the moulds, I mixed some silicone with oil paint and catalyst and painted in the first layer...


This was then left for 24 hours to cure!


After a day went by, I chucked a load of silicone in the mould, shown above, squashed the armature in then I clamped two parts of the mould together. (Shown Below!)


This is what they came out like, I was quite pleased!


Just a bit of snipping and filing down, and they were good to go!


High Five!

Tuesday, 30 April 2013

Head and Neck Sculpt Part 1

Hello there! Next I'll be talking about... the hard part!

The head and neck sculpt for the main character of my film 'Mirror Image'
To start, I first took made an eye socket shape in silicone by originally sculpting it in Super Sculpey Firm and then making a plaster mould of it. I removed the sculpey from the mould and replaced it with silicone
(Which is what you see below)


I then sculpted the neck around the boy's armature to get a nice neck and shoulders for shrugging!


 Just like with the eye sockets, I made a plaster cast of the neck, using the same methods as my previous post on this blog (but a one part mould rather than two) I then replaced the Sculpey sculpted neck with silicone, waited for it to cure and there you have it (however the neck pictured was too pale for the skin colour needed (as I needed it to match the spray can I will be using on the faces.) So all I did was re-cast and the second neck was fine!


Now, to make the head, Firstly, I created another eye socket, but a solid one this time, as the silicone one didn't work too well, I then built up around the socket with balsa wood to give the head a light core (as apposed to a heavy sculpey head that would put more strain than necessary on my wire armature)


 I then roughed out the shape I needed for the boy's head. this needed not to have any detail, but just be a guide to make replaceable faces on op of, so above is the head in progress, and below is the head baked and sanded.


To make fancy replaceable faces, I borrowed some knowledge from the brilliant Flynn Twins, and their brilliant bloomin' blogs:
http://joshua-flynn.blogspot.co.uk  
and
http://nathan-flynn.blogspot.co.uk

 being inspired by both their blogs, I layered some vaseline on top of the pre sculpted head core and mixed some two part epoxy putty named 'Milliput'. This was then pressed on to of the vaseline to create a mask, that was then separated to create a replaceable brow and a replaceable mouth section.

I then waited for the milliput to harden (up to 3 hours, but I like to leave it a little longer) and then went on to sculpting the face and hair!


 On to of the Miliput mask, I applied even more sculpey and sculpted the boy's features in a neutral position. Shown above...


The eyes were created by creating a silicone mould of a bead and then pouring polyurethane fast cast resin into the mould to make an endless amount of eyes!
To get a nice clear pupil and therefore a better performance when animating, I decided to digitally paint a pupil, and then print them out on matte photo paper to the right size and stick them to the eye.
The front of the eye was sanded down with a dremel first to make a flat surface for the eyes to stick on to.

I came up with this method by myself, but it does have its disadvantages, such as on the side view the eyes can look quite flat and strange, and sometimes the light can catch the pupil and just be a massive shine, so when animating, I'll just have to make sure I angle no harsh light onto the face and position the puppet in a position that wont effect the eye

Shouldn't be too much of a problem!


 Here's what the head looks like without the replaceable faces. minus an ear

It snapped off

I cried


Jokes


 Replaceable faces, Top and Bottom!


TADAH
That's enough for one post :)